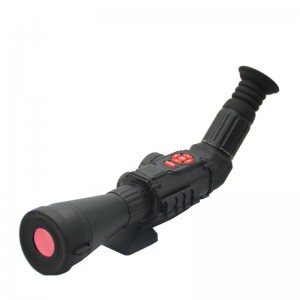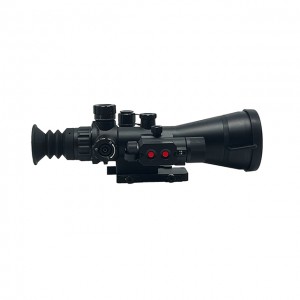


High Performance Digital Infared Hunting Night Vision Riflescope with IR Illuminator
Product features:
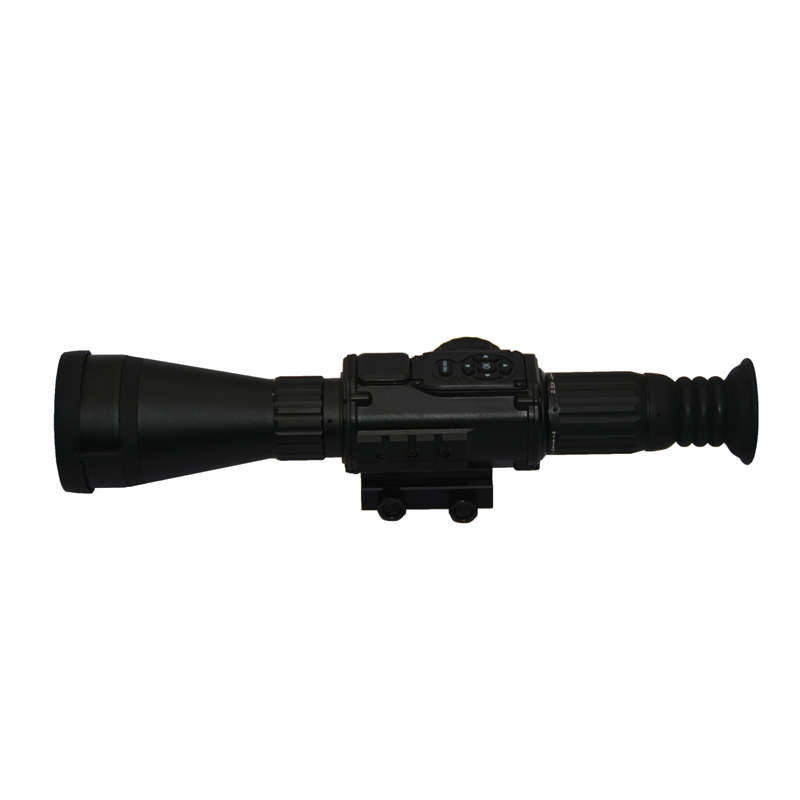
DT-DS8X is Detyl Optoelectronic company with the trend of the time, actively adjust their development to build a high-performance professional digital day-and-night dual-purpose scope, one-button return to zero, self-adaptive electronic dividing (electronic dividing and tracking);Low illumination adaptability is strong, high image quality, high precision, can be dual-use day and night ,ratio is large, light weight, high cost performance, etc. It also has day and night t camera, videos, GPS, wireless Wi-Fi transmission and other supporting functions, fully meet the needs of modern people "show", is the optimal choice for outdoor hunting.
Technical Specifications:
| DT-DS8X | DT-DS85 | DT-DS87 | DT-DS89 |
| Power supply | Li battery (CR123x3)、USB-5V | Li battery (CR123x3)、USB-5V | Li battery (CR123x3)、USB-5V |
| Battery Voltage range | 2.4-4.2V | 2.4-4.2V | 2.4-4.2V |
| Mounting | Fixed fixture | Fixed fixture | Fixed fixture |
| Power dissipation | <1.25W (WiFi OFF) | <1.25W (WiFi OFF) | <1.25W (WiFi OFF) |
| Battery capacity | 1500-2500maH | 1500-2500maH | 1500-2500maH |
| Battery life | 4-6H | 4-6H | 4-6H |
| Optics magnification | 5X Ф42 FL=50 | 7X Ф55 FL=70 | 9X Ф65 FL=90 |
| Mill (MOA) | 1/8--1/2 | 1/10--1/3 | 1/12--1/4 |
| Mill range (MOA) | +/-13 | +/-9 | +/-6.5 |
| Zero set mill (MOA) | +/-7.5 | +/-5 | +/-4 |
| Electronic zoom | 4X | 4X | 4X |
| F number | F1.3 | F1.4 | F1.5 |
| MTF | 150LP/mm | 150LP/mm | 150LP/mm |
| distortion | 0.5%Max | 0.5%Max | 0.5%Max |
| Distance range | 5M-∞ | 8M-∞ | 10M-∞ |
| Adjust mode | manual | manual | manual |
| Distance of pupil | 50mm | 50mm | 50mm |
| Eyepiece aperture | 8mm | 8mm | 8mm |
| Diopter range | +/-5 | +/-5 | +/-5 |
| Image sensor | CMOS | CMOS | CMOS |
| CMOS sensitivity | 1x10⁻³ Lx | 1x10⁻³ Lx | 1x10⁻³ Lx |
| Sensor resolution | 1080P | 1080P | 1080P |
| Display | 480x480x3 OLED | 480x480x3 OLED | 480x480x3 OLED |
| shock strength | >1000G | >1000G | >1000G |
| memory card capacity | 1-64GB Micro SD(fast type) | 1-64GB Micro SD(fast type) | 1-64GB Micro SD(fast type) |
| accessory function | record、GPS、WiFi、compass、HDMI | record、GPS、WiFi、compass、HDMI | record、GPS、WiFi、compass、HDMI |
| Temperature range | -20--+50℃ | -20--+50℃ | -20--+50℃ |
| Humidity range | 5%-95% | 5%-95% | 5%-95% |
| Waterproof | IP65/IP67 | IP65/IP67 | IP65/IP67 |
| Size | 280x79x72 | 305x79x72 | 335x79x72 |
| Weight(no battery) | 0.68KG | 0.75KG | 0.86KG |
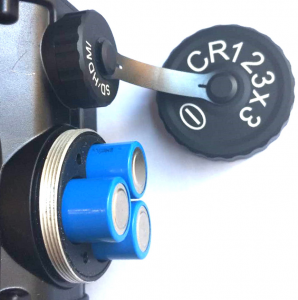
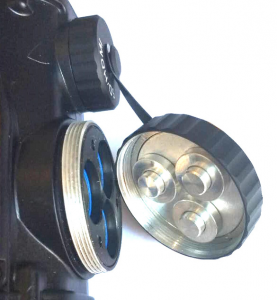
1. The battery installation
Rotate the battery cap counterclockwise, remove the battery cap,let three CR123 batteries toward "+" electrodes position in the battery cartridge(P①). Then the three negative poles of the battery cover are pointed at the three negative poles of the battery canister (P. 2). The screw teeth of the battery cover and the battery canister are pointed at. The battery cover is pushed slightly. The battery cover is rotated counterclockwise first. When the screw teeth are matched, the battery cover is rotated clockwise until the battery cover is put in place. Twist until tight. It needed to hold the battery cover to reduce friction between the battery cover threads When the battery cover is twisted clockwise.
2. ON/OFF
Press the "Power/Menu" button to open the machine. This product will take about 10-20 seconds to start the machine. After the system starts, the opening screen is displayed first, and then the view mode is directly entered,If the machine has a storage card, the system will be videotaped automatically, When the memory card file is full, continue to video will cover the first video files. In video mode, short press "OK" button can stop the video recording. If you open the machine then insert the memory card, the system will restart。Because of the concealed design,the Viewer needs to be slightly pushed forward by the eye mask。Under normal working state,Press the "Power/Menu" button to close the machine.
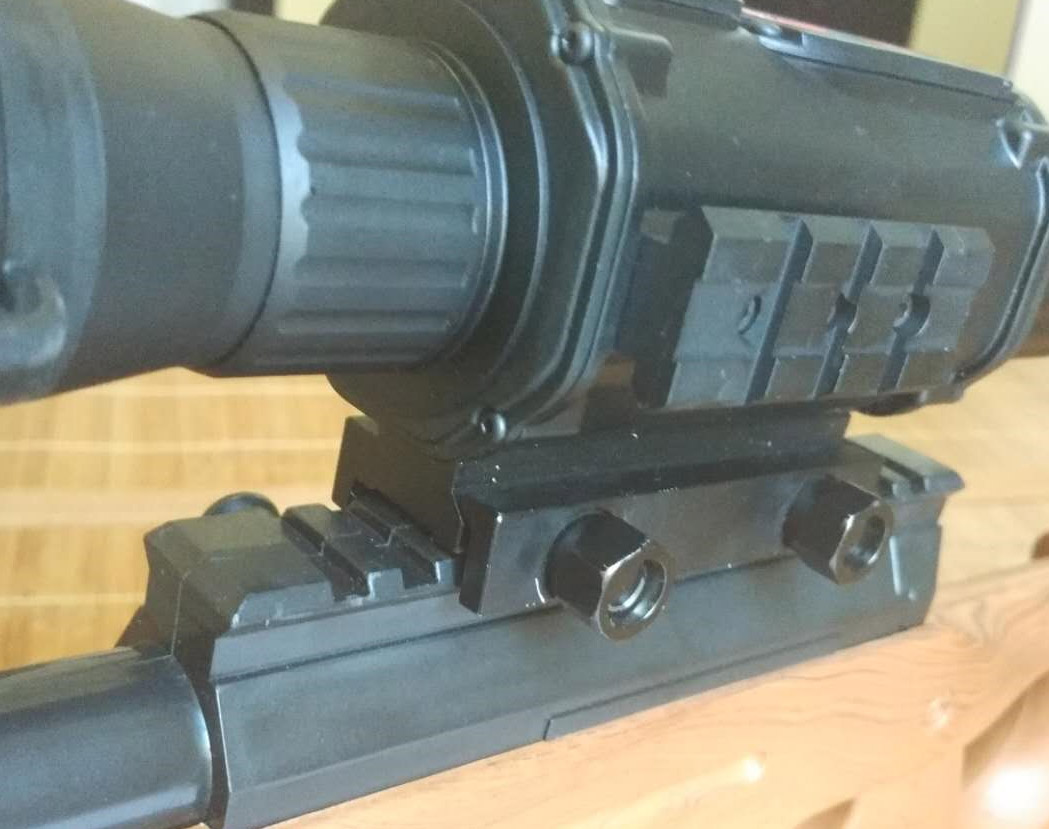
3. Installation
The locking nut of the digital aiming fixing clamp is twisted counterclockwise,and the fixing clamp slot of the digital aiming fixing clamp is corresponded to the pickup guide rail. The bottom of the clamping groove of the fixing clamp is attached to the top surface of the pickup guide rail. The locking nut of the clamping fixture is tightened clockwise to complete the installation of the aiming device.
4. IR illuminator(Optional)
How to install IR illuminator Please refer to 《IR illuminator source instructions》.
5. Eyepiece adjustment
When observing the image of the external environment, if the observed image is not clear, it is necessary to adjust the eyepiece visibility and the focal length of the objective lens. When the eyepiece is adjusted, please refer to the cursor only.Turn the eyepiece hand wheel clockwise or counterclockwise. When the clearest cursor is observed, stop turning. Complete eyepiece visibility adjustment.
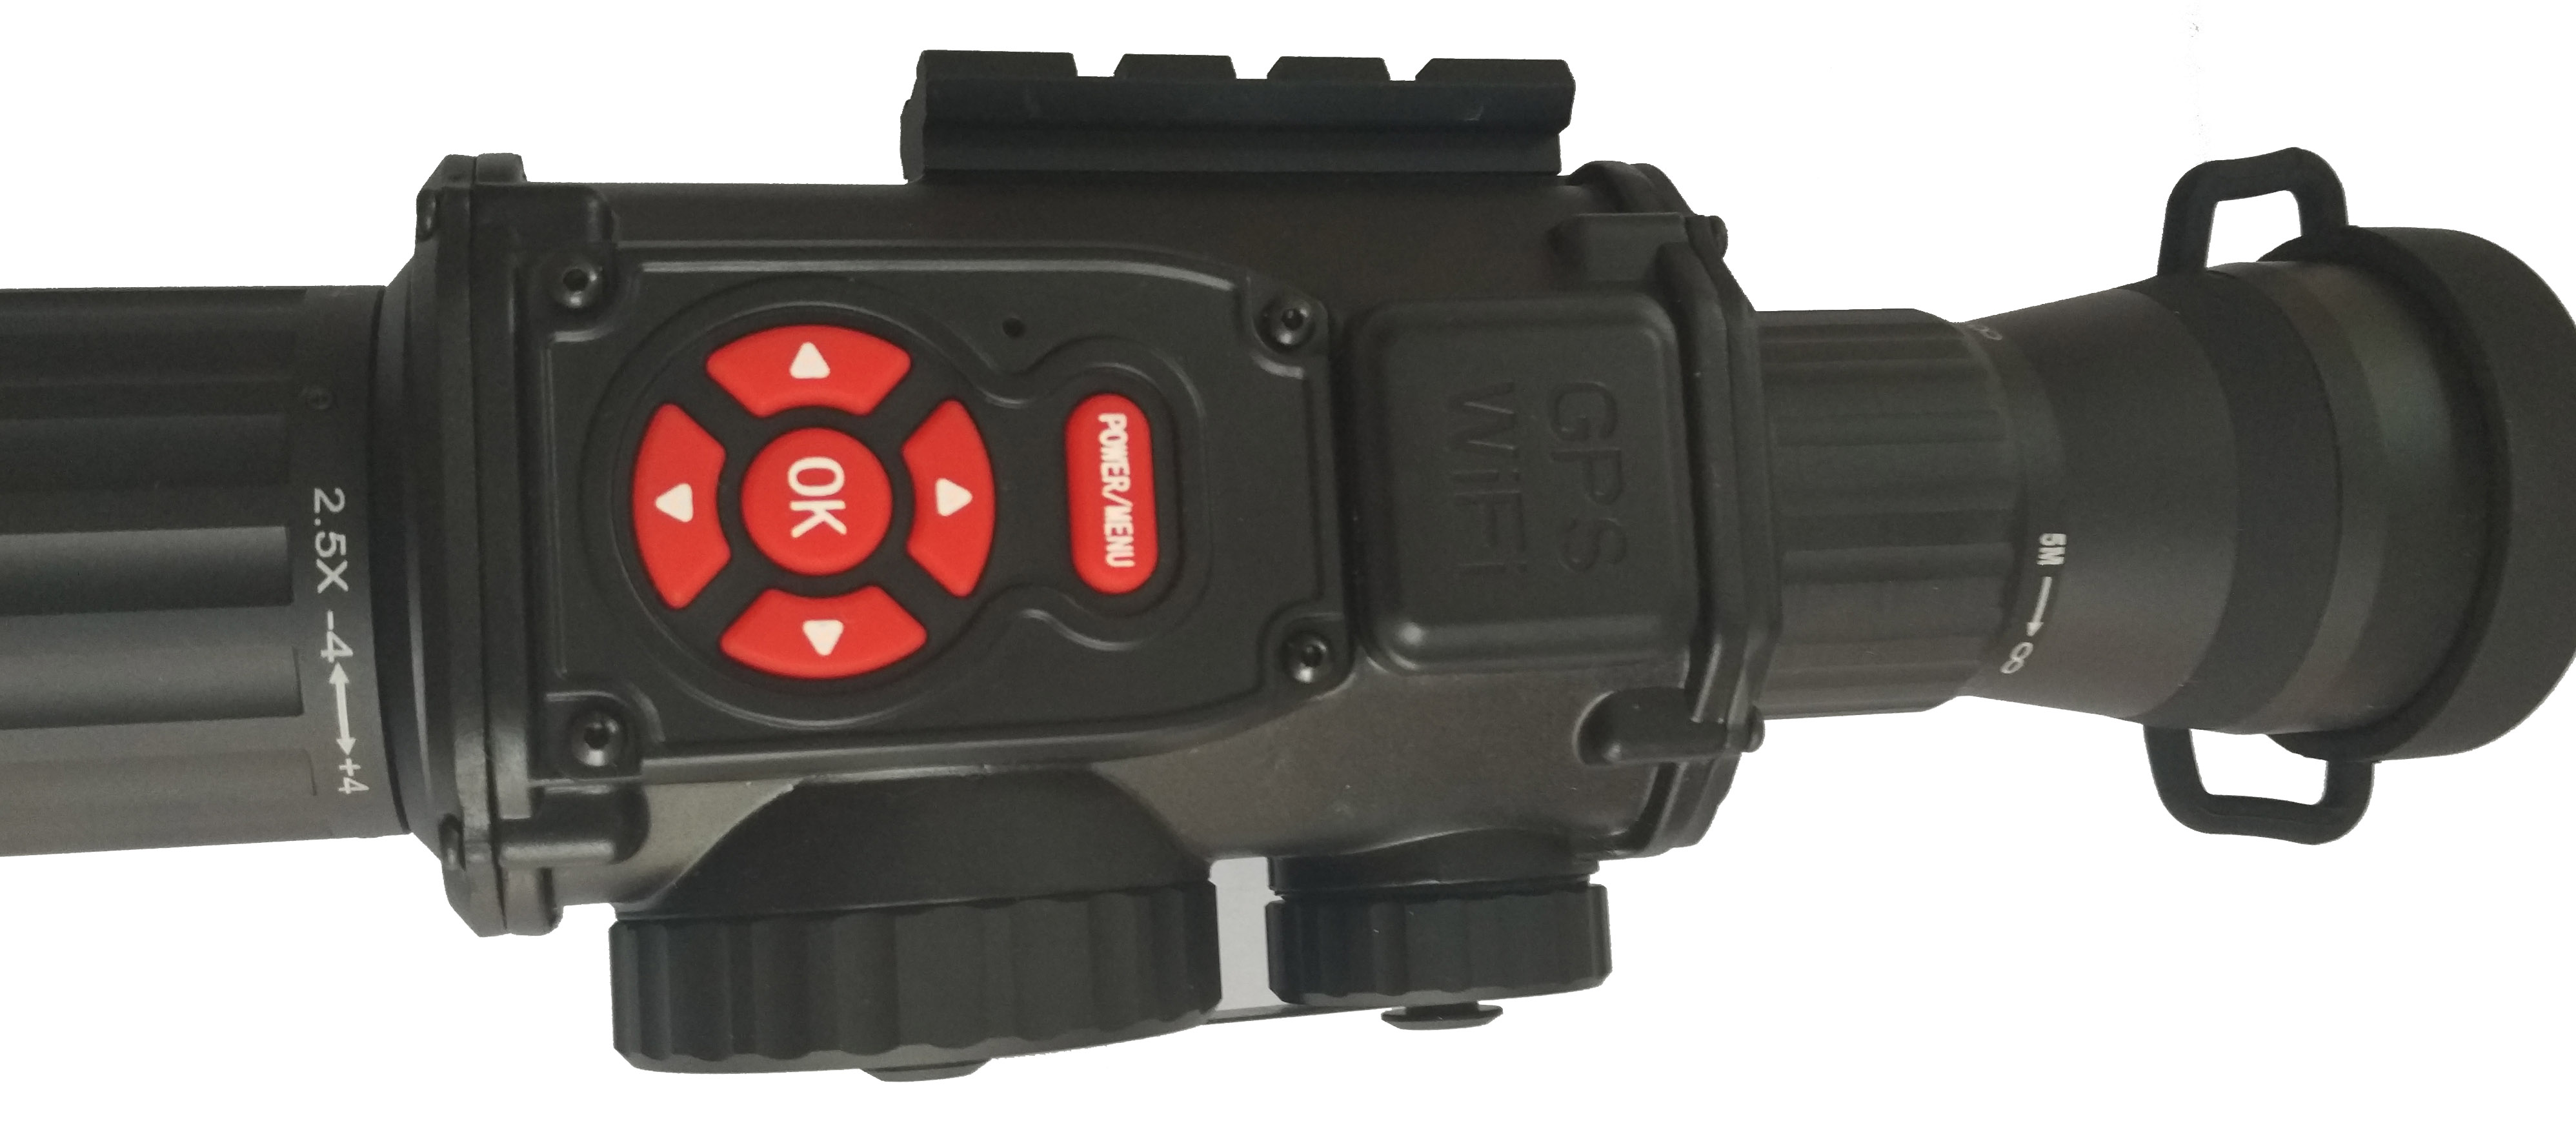
6. Objective lens adjustment
If the environmental image is not clear enough and the eyepiece vision has been adjusted, the focal length of the objective lens needs to be adjusted. When focusing the objective lens, first select the object to be observed, then clockwise or counter-clockwise rotation of the objective hand wheel, until the clearest image is observed, complete the objective lens focusing.
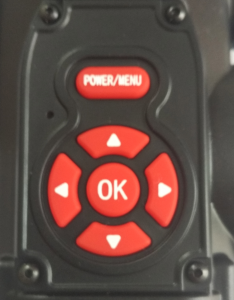
7. Menu operation
Press the "Power/Menu" button in the operation button to enter the setup menu.
In the menu settings, press the up and down keys to highlight the corresponding menu options. Press "OK" key to choose settings. After setting up, presses "Power/Menu" to Exit setup mode.
Mode:The mode menu is used to set up the working mode of the system.
Color mode, black and white mode and night vision mode.Click the up and
down arrow keys to light the corresponding mode, and then press the "OK" button to confirm the selection. The color mode is used for daytime or strong lighting. The sharpest image can be observed. In the night vision mode, the system improves the sensitivity of the sensor. At the same time, the effective spectral bandwidth is increased to achieve the best night vision effect.
Target Calibration: Target calibration is used to correct the deviation between the aiming target and the actual impact point, to correct the installation accuracy of the sight, and to calibrate the environmental error to design a quick correction function. In the shooting training, when the impact point deviates from the position of the target, and the shooting accuracy is insufficient, the target calibration operation is required.
When using the target calibration function, first activate the function menu and select the target calibration function. When the yellow cross flashes on the red cross, and the Target calibration icon flashes in upper left corner of the screen, indicating that the target calibration mode has been entered. At this time, the sight cross is lined up with the target and shot. After this while ensuring that the original red dotted line is aligned with the target, then Press the direction key of the operation keyboard to move the flashing yellow cross to the impact point. After pressing the confirmation, the yellow cross will stop flashing and become a red cross. The red cross that is originally aligned with the disappears to complete the target calibration operation.
In actual use, to ensure better gun quality, it is recommended to cycle several times to improve the target calibration accuracy.
Electronic compass:This menu is used to open and close the azimuth and dip Angle detection of geomagnetic field. Choose to open or closed and confirmed, electronic compass will open or stop working.(the system default electronic compass open). After open the electronic compass, ensure the accuracy of the test, when the line of sight to open, please try to keep the level of the fuselage,DT-DS8X series digital sighting is DETYL Optoelectronic company with the trend of the time, actively adjust their development to build a high-performance professional digital day-and-night dual-purpose sighting, one-button return to zero, self-adaptive electronic dividing (electronic dividing and tracking).When a compass data display for the green (color and black and white mode) or display data for white (night vision mode), suggests that the magnetic field calibration has been completed. Current magnetic field data displayed in the upper right corner of the screen, in two rows, according to the above row shows the magnetic field orientation, southwest (WE: 320.5 ,320.5 degrees Celsius);The following line shows the tilt Angle, (U up dip 12.3 degrees, 12.3 D 25.1, 25.1 degrees)
Recording: This option is used to open or close the machine built-in Mic. The system is off by default. Open after the recording, video voice will be input to the video file at the same time.
Date label: this menu is used to open or close the time information. After the opening date label, video and photo files will increase the time watermark in time (following upgrades will increase storage file line watermark switch).
Cursor mark:cursor mark is used to print the cross mark into the recording video files. If set open, the cross mark will be displayed in the playback video.
GPS:This menu is used for opening and closing satellite positioning function, is closed by default. When open the GPS to receive satellite positioning information display (pictures and videos, documents) will increase the positioning information。If need satellite positioning, do make sure that this sight is not obscured, shielding. Location information is divided into two line shows the lower left corner of screen, when the system is not receive positioning information, screen for two lines "--" When after receipt of the positioning information uplink display dimensions:N 22.4433 degrees north latitude 22.4433 degrees; S 32.2235 degrees south latitude 32.2235 degrees; lower display longitude: E 113.4632 degrees east longitude 113.4632 degrees; W 85.2325 degrees west longitude 85.2325 degrees
WiFi: this menu is used to turn on or off the local WiFi data transmission, which is off by default. To turn on WiFi, you need to insert a memory card. After turning on WiFi, you can connect to the device with a mobile terminal. After the device is connected, you can not only see the real-time image captured by the device, but also control the device in real time. When you press the local OK key, the system will automatically turn off WiFi and switch to the local operation state. When the battery voltage is insufficient, the system will automatically exit WiFi. (Note: when WiFi is turned on, rechargeable lithium battery (voltage above 3.5V) or USB power supply must be used.)
Language Settings: this menu is used to set up the system of the current language; there are 10 kinds of language options to choose from, the default for simplified Chinese. When choosing to the appropriate language and confirmation, system changes all menu options for the current language.
Time/date: this menu is used for calibrating the current time, enter the time/date menu, press the left and right key choice needed to set the date/time options, according to the up and down arrow keys to adjust values, click "OK" button to return to.
Formatting: this menu is used to format the memory card, choose and confirm the format, the inside of the memory card all content will be cleared.
Factory Settings: this menu is used to restore the initial setup of the product, after the restore factory Settings, before all of the Settings have been recovered.
Version information: this list is used to display this product's software version information.
8. USB power supply
This digital pointing supports external power supply, and can be produced through Micro USB Power supply. When using external power supply, Remove the non-rechargeable battery. The external power supply voltage range is 5V Electricity. External power supply 5 v voltage range, available charging treasure power supply to the sight。When using a USB power supply, open the multifunctional cover; insert the Micro USB line USB block. Note not against, in order to avoid damage to the product.
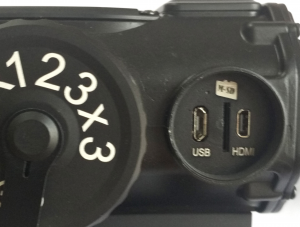
9. The HDMI hd output
This digital aim is equipped with high definition video output HDMI, insert Micro HDMI line HDMI interface of the machine, you can output high-definition video. As shown in figure (4) when high-definition video output, internal display automatically shut down。
10. Video recording
This digital scan of the built-in hd video recording, if video need please insert the Micro SD card. The video mode is in normal sight mode. The top left of the screen has a VCR icon. When the key starts recording and video recording,there will be red dots flashing on the screen. It means that the current is being videotaped. Video will show the length of the video time.(Note: when battery voltage is below 2.5V, < ordinary battery > or lower than 3.5V < the rechargeable lithium battery >, the system automatically stop the video recording and prohibits operation again )
11.Photos
In the normal view mode at video (stop), long press(10sec) "OK" button to enter picture mode. In photo mode screen to the left will have a camera icon. Photograph short press "OK" button, press time, take only one photo, If you have any open time Settings menu information, photos will increase the time watermark. To take photos, it is necessary to insert the memory card. (Note: Photography is prohibited when the battery voltage is less than 2.5V <ordinary battery > or less than 3.5V < rechargeable lithium battery >)
12. Play Back
In the photo mode,long press (10sec)the "OK" button to enter the playback mode, in the playback mode. Press the "OK" button to start playback, and press the "OK" button again to stop playing. Short press the up and down arrow keys to turn back and forth. Short click the left and right arrow keys, fast forward and quickly return the current video playback.In the playback mode,long press(10sec) the "OK" button to return to the normal sight mode (video mode).
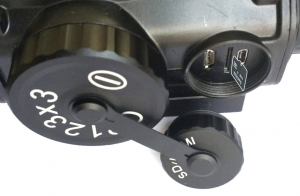
13. Electron multiplication
In the normal sight mode, short press the up and down arrow keys can change the electron multiplying rate.("Z: x1.0--Z: x4.0") Up arrow key increases electron multiplication, downward direction key reduces electron multiplication. The rate of change is 0.1 times per time, and the maximum is 4.0 times.
Note: in order to ensure the accuracy of aiming, electronic zoom occurs. The crosswise line of sight is automatically corrected according to the magnification and the current position of the crosswise line of sight, but the value of the cursor position remains unchanged.
14.Graduation adj.
The digital targeting is digital OLED display,The division and adjustment range is +/-25 lattice ,each checks is a pixel. In the vertical and horizontal direction, the adjusting range is exactly the same as that of the adjustment.In actual use, the movement of the dividing cursor can be adjusted by the upper and lower / left and right keys. When enter graduation adjust,short press arrow key for each ,The cursor moves one pixel. (electron multiplying at 1.0X),The cumulative number of moving figures will be displayed on the screen. The number displayed is the offset value of the current cursor position and zero bit.turn up and turn right is‘+’, turn left and turn down is ‘-’,Long press the arrow keys to speed up the movement. For electron multiplying over 1X ,press arrow key for each,The number of mobile digits is the same as that of 1.0X, but the distance of actual movement varies with different rates.but, the position of the cursor corresponding to the target does not vary with the electron multiplication rate.
15. Night vision function
This digital aiming support is used for day and night. During daytime use, the color mode can be used to make the observed targets more real and clear. In order to achieve the best day effect, do not open the lens cover. In order to reduce the effect of strong light on high sensitivity image sensor.Under normal observation mode, press the "Power/Menu" button to enter the menu mode. Click the up / down button to highlight the "mode" menu, and the "OK" button enters the mode setting. Press the up/down direction key again, select the mode you want, confirm the" OK" key, enter the mode you want, and then press Power/Menu to exit the settings. Since the digital targeting uses a highly sensitive CMOS sensor, You can also get very good night vision at night. Night time sensor is more sensitive when used at night. Under the starlight environment, we can achieve the desired sighting effect. Please open the lens cover at night.
Noted:
1. Compass Calibration
Please place the product horizontally when you turn on the engine. Please calibrate the electronic compass according to the electronic compass calibration before starting.
2. Moisture-proof
The design of this night vision product has waterproof function, its waterproof ability is up to IP67 (optional), but the long-term wet environment will also slowly eroding the product, causing damage to the product, so please store the product in a dry environment.
3. This product is a high precision photoelectric product. Please take the instructions strictly in accordance with the instructions. When it is not used for a long time, please take out the battery and keep the product in the dry, ventilated and cool environment, and pay attention to the light shading, dustproof and shock resistance.
4. Do not disassemble and repair the product during use or when it is damaged by improper use. Please contact the distributor directly.