In the realm of modern optics and tactical equipment, night vision clip - on systems have emerged as a game - changer for those operating in low - light conditions. As a supplier of night vision clip - on systems, I am excited to share with you the ins and outs of using these remarkable devices to enhance your vision in the dark.
Understanding Night Vision Clip - On Systems
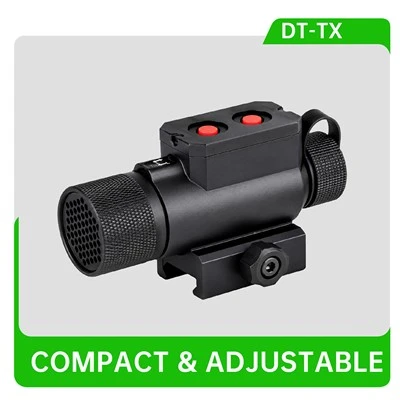
Before delving into the usage, it's crucial to understand what night vision clip - on systems are. A night vision clip - on system is a compact, attachable device that can be added in front of an existing daytime scope. It allows users to convert their day scopes into night - capable ones without the need to invest in a completely new night vision scope. This not only saves cost but also provides flexibility, as you can easily switch between day and night operations.
There are different generations of night vision technology, with each offering varying levels of performance. For example, the Gen 2+ Dayscope Clip On Systems provide a good balance between performance and cost. These systems are capable of detecting low levels of light, such as moonlight or starlight, and amplifying it to create a visible image.
Preparing for Use
Mounting the Clip - On System
The first step in using a night vision clip - on system is to mount it correctly in front of your day scope. Most clip - on systems come with a mounting mechanism that is designed to be compatible with a variety of scopes. It's important to ensure that the clip - on system is securely attached and properly aligned. A misaligned clip - on can result in a distorted or blurry image.
Start by loosening the mounting screws on the clip - on system. Place the clip - on in front of the day scope, making sure that the optical axes of both devices are in line. Then, tighten the mounting screws gradually, checking the alignment at each step. It may take a few tries to get the perfect alignment, but it is well worth the effort.
Powering Up
Once the clip - on system is mounted, it's time to power it up. Most night vision clip - on systems use batteries, and it's essential to have fully charged batteries before heading out. Check the battery compartment and insert the appropriate batteries according to the manufacturer's instructions.
After inserting the batteries, turn on the clip - on system. Some systems may have a simple on/off switch, while others may have additional controls for adjusting brightness, gain, or other settings. Familiarize yourself with these controls before you need to use them in the field.
Adjusting the Settings
Focus Adjustment
Proper focus is crucial for obtaining a clear image. Start by looking through the day scope and the clip - on system at a distant object. Use the focus adjustment ring on the clip - on system to bring the object into sharp focus. If the image is still blurry, you may need to adjust the focus of the day scope as well.
It's important to note that the focus of the clip - on system may need to be readjusted depending on the distance of the target. For close - range targets, you may need to refocus the clip - on to get a clear image.
Brightness and Gain Adjustment
The brightness and gain settings on a night vision clip - on system can significantly affect the quality of the image. Brightness refers to the overall level of light in the image, while gain refers to the amplification of the available light.
In low - light conditions, you may need to increase the gain to make the image more visible. However, increasing the gain too much can result in a grainy or noisy image. On the other hand, if the brightness is too high, the image may be overexposed, and details may be lost. Experiment with different brightness and gain settings to find the optimal combination for the specific lighting conditions.


Using the Clip - On System in Different Low - Light Scenarios
Moonlit Nights
On moonlit nights, there is a relatively good amount of ambient light available. This makes it easier to use a night vision clip - on system. You can usually set the gain and brightness to a moderate level to get a clear image. Look for objects that are illuminated by the moonlight, such as the edges of buildings, trees, or open fields.
The Night Vision Sight Clip On Systems are particularly effective on moonlit nights, as they can take advantage of the available light to provide a detailed image. You may be able to spot wildlife, track movements, or perform surveillance with ease.
Starry Nights
On starry nights, the ambient light is much lower than on moonlit nights. In this case, you will need to increase the gain on the clip - on system to amplify the faint starlight. However, be careful not to overdo it, as this can lead to a noisy image.
It may also be helpful to look for areas with a higher concentration of stars, as these areas will provide more light. Additionally, using a tripod or other stabilizing device can help reduce image shake, which can be more noticeable in low - light conditions.
Overcast or Cloudy Nights
On overcast or cloudy nights, the ambient light is extremely low. This can be a challenge when using a night vision clip - on system. You may need to set the gain to its maximum value and adjust the brightness carefully to get any usable image.
In such conditions, it's important to be patient and take your time to scan the area. Look for any sources of light, such as distant streetlights or vehicle headlights, as these can help you orient yourself. If possible, try to position yourself in an area where there is some reflected light, such as near a large building or a body of water.
Maintenance and Care
Proper maintenance and care of your night vision clip - on system are essential to ensure its longevity and performance. After each use, clean the lenses of the clip - on system with a soft, lint - free cloth. Avoid using abrasive materials or harsh chemicals, as these can damage the lenses.
Store the clip - on system in a cool, dry place when not in use. If you are storing it for an extended period, remove the batteries to prevent corrosion. Additionally, periodically check the mounting mechanism and other components for any signs of wear or damage.
Conclusion
Night vision clip - on systems are a powerful tool for enhancing your vision in low - light conditions. By understanding how to use them properly, you can make the most of these devices in various scenarios. Whether you are a hunter, a law enforcement officer, or an outdoor enthusiast, a night vision clip - on system can provide you with a significant advantage.
If you are interested in purchasing a night vision clip - on system or have any questions about our products, we encourage you to contact us for a procurement discussion. Our team of experts is ready to assist you in finding the right solution for your needs.
References
- Optics and Photonics Handbook, Third Edition.
- Night Vision Technology: Fundamentals and Applications.