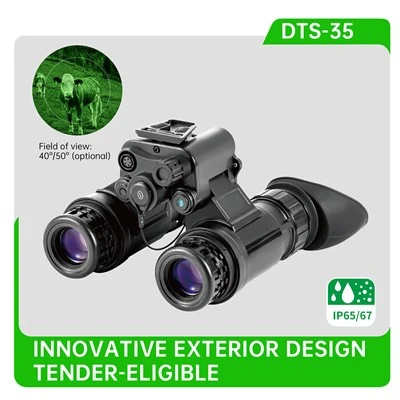
Hey there! As a supplier of night vision monoculars, I often get asked about how to adjust the brightness of these nifty devices. It's a crucial aspect, especially when you're out in the dark, trying to spot something or just enjoy the nocturnal scenery. So, let's dive right into it.
First off, let me give you a bit of a background. Night vision monoculars work by amplifying the available light, whether it's from the moon, stars, or artificial sources. The brightness adjustment is all about finding that sweet spot where you can clearly see what you're looking at without over - saturating the image.
There are different types of night vision monoculars out there, each with its own set of features and ways to adjust brightness. For instance, we have Handheld Night Vision Monoculars. These are super convenient as you can carry them around easily. Most handheld models come with a brightness adjustment knob or button. Usually, it's located on the side or near the eyepiece.
To adjust the brightness on a handheld night vision monocular, you'll want to start in a relatively dark area. Turn on the device and look through the eyepiece. You'll notice that the image might be too dark or too bright. If it's too dark, slowly turn the brightness adjustment knob clockwise. As you do this, you'll see the image start to lighten up. Keep turning until you can clearly make out the details of the objects in your view.
On the other hand, if the image is too bright, turn the knob counter - clockwise. This will reduce the amount of light amplification, and the image will become darker. It might take a few tries to get it just right, but once you do, you'll have a clear and sharp view of your surroundings.
Then we have Helmet Mounted Night Vision Monoculars. These are great for hands - free use, especially for activities like hunting or military operations. The brightness adjustment on helmet - mounted monoculars is often a bit different. Some models have a remote control that you can attach to your clothing or gear.
With the remote control, you can easily adjust the brightness without having to take the monocular off your helmet. Just press the up or down buttons on the remote to increase or decrease the brightness. This is really handy when you're in a situation where you need to quickly change the settings, like when you're moving from a well - lit area to a darker one.
Another type is High Gain Night Vision Monoculars. These are designed to work in extremely low - light conditions. They have a higher amplification factor, which means they can make even the faintest light visible. However, this also means that the brightness adjustment is more critical.
In high - gain monoculars, the brightness adjustment is usually more sensitive. A small turn of the knob can make a big difference in the image brightness. So, when you're adjusting the brightness, be very gentle. Start with small adjustments and wait a few seconds to see how the image changes. This way, you can avoid over - brightening the image and losing the details.
Metal Housing Night Vision Monocualrs are known for their durability. They can withstand rough handling and harsh environments. The brightness adjustment on these monoculars is similar to the handheld ones. But because of the metal housing, they might have a slightly different feel to the adjustment knob.
The metal housing can make the knob more solid and less likely to get damaged. When you're adjusting the brightness, you'll notice that the movement of the knob is smooth and precise. This allows for more accurate brightness adjustments, which is great when you need a very specific level of light.


Lastly, Lightweight Night Vision Monoculars are perfect for those who need to carry their equipment for long periods. They're easy to handle and don't weigh you down. The brightness adjustment on lightweight monoculars is usually simple and straightforward.
Most lightweight models have a touch - sensitive button for brightness adjustment. You just need to tap the button to increase or decrease the brightness. This is a really convenient feature, especially when you're on the go and need to make quick adjustments.
Now, a few tips to keep in mind when adjusting the brightness of night vision monoculars. First, always start with the lowest brightness setting and gradually increase it. This way, you can avoid over - saturating the image right from the start. Second, if you're in an area with a lot of light sources, like near a streetlight or a campfire, you might need to reduce the brightness to avoid glare.
Also, remember that different objects reflect light differently. For example, a white object will appear brighter than a black object. So, you might need to adjust the brightness depending on what you're looking at. And if you're using the monocular for a long time, the battery might start to run low, which can affect the brightness. In this case, you might need to replace the battery or recharge it.
If you're having trouble adjusting the brightness or if you have any other questions about our night vision monoculars, don't hesitate to reach out. We're here to help you get the most out of your night vision experience. Whether you're a hunter, a nature enthusiast, or someone in the military, our monoculars are designed to meet your needs.
So, if you're interested in purchasing night vision monoculars or want to discuss your requirements further, just drop us a line. We'll be more than happy to assist you in finding the perfect monocular for your needs and guide you through the brightness adjustment process.
References
- Various product manuals of night vision monoculars
- Industry research on night vision technology