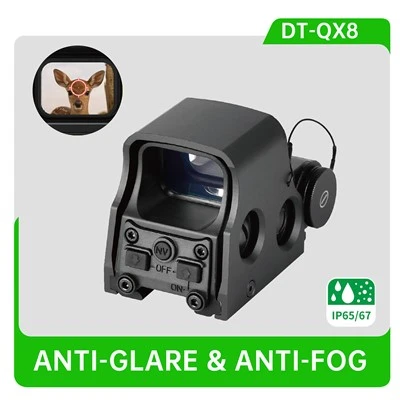
When it comes to low-light and night-time operations, a night vision clip-on system can be a game-changer. As a provider of high - quality night vision clip-on systems, I often get asked about the best way to mount these remarkable devices. In this blog, I'll share in-depth knowledge on how to properly mount a night vision clip-on system to ensure optimal performance.
Understanding Night Vision Clip - On Systems
Before delving into the mounting process, it's essential to understand what a night vision clip-on system is. A night vision clip-on system is a device that can be attached to an existing daytime scope. It allows users to quickly convert their day scopes into night - vision capable scopes without having to switch out the entire optic. Our Night Vision Sight Clip On Systems come in various models and generations, each designed to meet different user needs and budgets.


Tools Required for Mounting
To mount a night vision clip - on system, you'll need a few basic tools. These typically include a set of Allen wrenches, which are used to tighten the mounting screws. Make sure the Allen wrenches are the correct size for your specific clip - on system and mounting hardware. A torque wrench can also be very useful, as it allows you to tighten the screws to the manufacturer's recommended torque specifications. This is crucial because over - tightening can damage the device or the scope, while under - tightening can result in a loose and unstable mount.
Pre - mounting Checks
Before you start the actual mounting process, there are several pre - mounting checks you should perform. First, inspect the night vision clip - on system for any signs of damage or defects. Check the lenses for scratches or smudges, and make sure all controls and buttons are functioning properly. Next, examine your daytime scope. Ensure that the mounting area is clean and free of debris. If there is any dirt or grime on the scope, it can affect the stability of the clip - on system.
Selecting the Right Mounting Location
The location where you mount the night vision clip - on system is extremely important. Most clip - on systems are designed to be mounted in front of the daytime scope. This position allows the night vision device to capture the incoming light before it enters the day scope, providing clear and enhanced night vision. However, the exact mounting location can vary depending on the model of the clip - on system and the day scope.
When choosing the mounting location, consider the following factors:
- Eye Relief: Ensure that the mount allows for proper eye relief. Eye relief is the distance between your eye and the eyepiece of the scope. If the clip - on system is mounted too close or too far from the day scope, it can affect your ability to see through the scope and may cause discomfort.
- Alignment: The night vision clip - on system must be perfectly aligned with the day scope. Misalignment can result in a distorted or blurry image. To achieve proper alignment, some clip - on systems come with adjustable mounts that allow you to fine - tune the position.
Step - by - Step Mounting Process
- Prepare the Mounting Hardware: If your night vision clip - on system comes with a separate mounting bracket, attach it to the clip - on device first. Use the appropriate Allen wrenches to tighten the screws, but do not over - tighten them at this stage.
- Position the Clip - On System: Carefully place the clip - on system in front of the day scope at the selected mounting location. Align the mounting bracket on the clip - on system with the corresponding mounting points on the day scope.
- Secure the Clip - On System: Once the clip - on system is properly positioned, start tightening the mounting screws. Use a torque wrench to ensure that the screws are tightened to the recommended torque. Begin by tightening the screws slightly, then check the alignment of the clip - on system again. If necessary, make minor adjustments to the position before fully tightening the screws.
- Test the Alignment: After tightening the mounting screws, look through the day scope and check the alignment of the night vision image. The image should be centered and clear. If there is any misalignment, loosen the screws slightly and make the necessary adjustments. Then, retighten the screws.
Using Different Generations of Clip - On Systems
There are different generations of night vision clip - on systems, such as Gen 1, Gen 2, and Gen 2+. Each generation has its own features and mounting requirements. Our Gen 2+ Dayscope Clip On Systems offer enhanced performance compared to earlier generations.
Gen 2+ systems typically have more advanced optics and greater light - gathering capabilities. When mounting a Gen 2+ clip - on system, it's even more crucial to ensure proper alignment and a secure mount. These systems are often more sensitive to vibrations and misalignment, which can affect the quality of the night vision image.
Maintaining the Mounted Clip - On System
Once the night vision clip - on system is mounted, proper maintenance is essential. After each use, inspect the mounting hardware to make sure the screws are still tight. Loose screws can cause the clip - on system to shift or become misaligned. If you notice any signs of wear or damage to the mounting hardware, replace it immediately.
Keep the lenses of the clip - on system clean. Use a lens cleaning solution and a soft microfiber cloth to gently clean the lenses. Avoid using abrasive materials that could scratch the lenses.
Special Considerations for Different Applications
- Hunting: When using a night vision clip - on system for hunting, you may need to mount the device securely to withstand the recoil of the firearm. Make sure the mounting hardware is properly tightened and that the clip - on system is well - aligned to ensure accurate aiming.
- Military and Law Enforcement: In military and law enforcement applications, rapid deployment and reliability are crucial. The clip - on system should be easy to mount and dismount quickly. Consider using a quick - release mounting system that allows you to attach and remove the device in seconds.
Conclusion
Mounting a night vision clip - on system correctly is essential for achieving optimal performance. By following the steps outlined in this blog, you can ensure that your night vision clip - on system is securely mounted and properly aligned. Whether you're a hunter, a military professional, or just someone interested in exploring the night, our high - quality night vision clip - on systems can provide you with the enhanced vision you need.
If you're interested in purchasing a night vision clip - on system or have any questions about mounting, feel free to reach out. Our team of experts is ready to assist you in finding the right product for your needs and providing you with any technical support you may require.
References
- "Night Vision Technology and Applications" - Industry research report on night vision systems.
- Manufacturer's user manuals for various night vision clip - on systems.